
Mastering the Tata Altroz iCNG Spare Wheel Swap: Step-by-Step Guide to Remove, Replace, Change
Here’s a step-by-step guide on removing the Tata Altroz iCNG spare wheel, and returning it to its cradle. Knowing how to remove and replace the spare wheel can save you time and money. Understanding this simple process will help you handle unexpected tyre situations.
Unlike traditional CNG systems that occupy precious trunk/boot space space, Tata Altroz iCNG’s twin cylinders are positioned to maximise storage capacity. They are safeguarded with a hardcover, which has a slot for the crank handle wrench toolkit to remove the spare wheel.
Removing and Replacing Tata Altroz iCNG spare wheel, car wheel
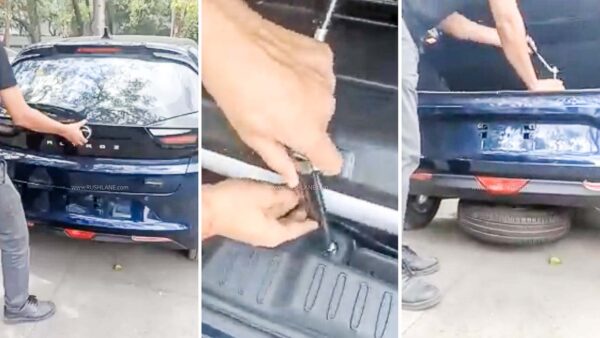
To access the spare tyre, look for the crank hole in the boot. You’ll find it right in front of the dual CNG tanks. Insert the crank handle into the hole/slot. Thereafter, turn the crank handle counterclockwise to lower the spare tyre from below. Ensure there is enough slack to remove the tyre from the vehicle.
To remove the Altroz iCNG spare wheel, you’ll need to create slack in the mechanisms/ components that secure it in place. In this case it’s the cable chain bracket holding the tyre underneath the vehicle. Loosen/ release this cable chain bracket to create slack. Keep rotating counterclockwise even once the tyre touches the ground. Subsequently, you have created enough slack, you can slide the wheel out from under the vehicle. Before installing the spare tyre, it’s crucial to check its air pressure.
Tata Altroz iCNG spare tyre change, return damaged wheel to its cradle
Slide the wheel under. Ensure the chain used to secure the tyre is positioned in the centre of the wheel. The bracket will do its job as you lift the tyre back into position. Focus on keeping the chain centred. This will help maintain balance and stability during the process. Ensure it is aligned with the cradle for a secure fit. Continue turning the crank handle clockwise until the spare tyre is close to lifting off the ground.
Recheck the positioning, and make any necessary adjustments. Then, turn the crank handle clockwise until it becomes tight. And you can’t turn it any further. Consequently, the tyre will be secured in its mounting position. Place the toolkit in its bag, and back into its designated slot. Double-check the positioning of the wheel. Ensure it is securely attached to the vehicle. This step is crucial for safe and reliable travel.
On the Road Again: Swift Spare Tyre Replacement
How often should I check the air pressure of my spare tyre?
It’s good practice to check the air pressure of your spare tyre periodically, along with the rest of your tyres. Aim to check it at least once every few months or before long trips to ensure it is properly inflated and ready for use when needed.
Can I drive long distances with a spare tyre?
Spare tyres are not designed for long-distance driving. They have limited mileage capabilities and different handling characteristics compared to regular tyres. It is advisable to drive to the nearest service centre or tyre shop to have your damaged tyre repaired or replaced.